Posted on Leave a comment

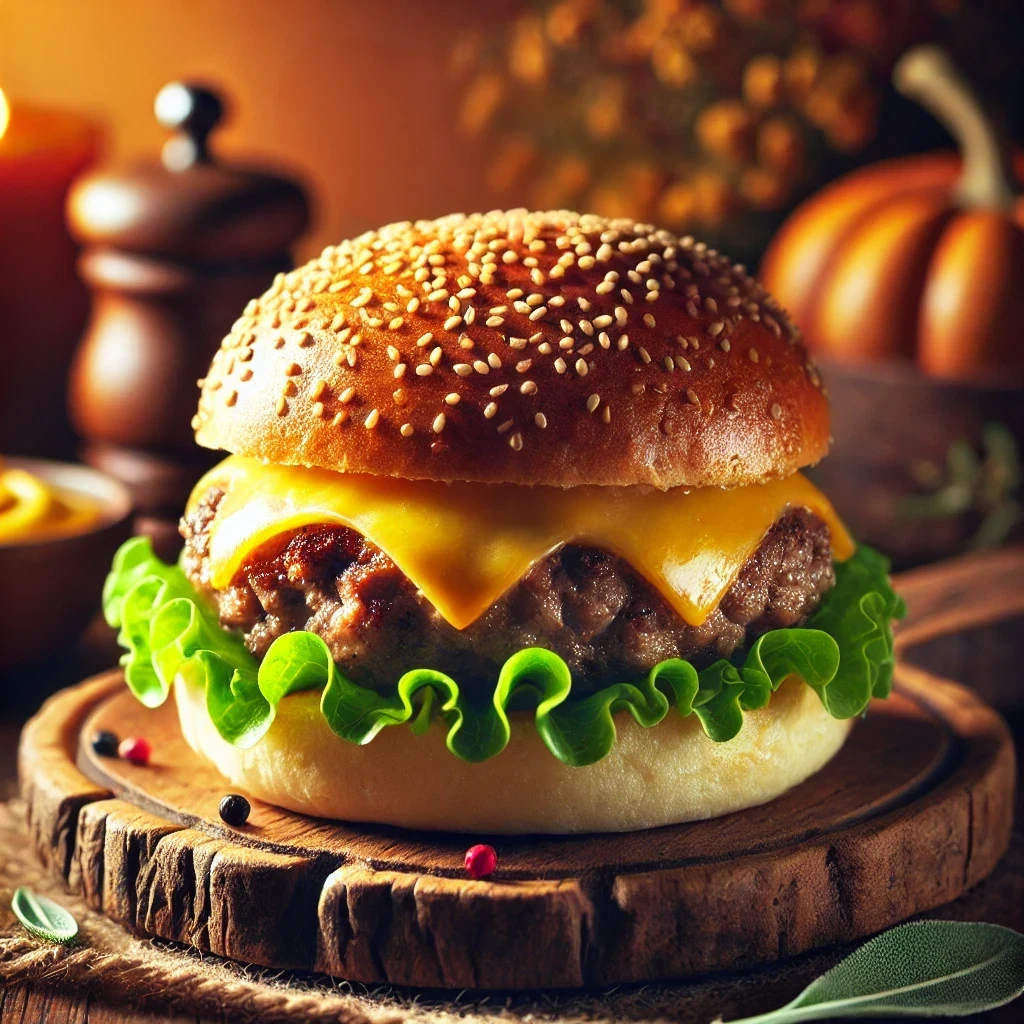
A Sweet Twist on a Classic: Apple-Infused Gourmet Burgers

A Sweet Twist on a Classic: Apple-Infused Gourmet Burgers

Sometimes, the best recipes come from the simplest inspirations. For me, this burger was born from a casual conversation with my aunt. She recommended adding apple to a burger, and the idea intrigued me. Sweet and savory flavors playing together in a perfectly juicy patty? I had to try it.

At our house, gourmet burgers are a bit of a tradition. We love experimenting with blends of beef and pork, tweaking ingredients until we find the perfect balance. This time, we went a step further, adding minced Fuji apple right into the mix. The result? A juicy, flavorful burger with a subtle sweetness in every bite that had my family coming back for more.

Why Apple? Why Not!

What makes this burger so special isn’t just the apple—it’s the way all the flavors harmonize. The pork adds richness, the beef lends that classic burger taste, and the apple keeps everything juicy and tender. As if that weren’t enough, I topped mine with caramelized onions. Let me tell you: the sweetness of those onions paired with the savory burger is next-level delicious.

And for my son? He loved his with BBQ sauce and a lettuce wrap. We swapped out traditional buns for butter lettuce boats, and it was a game-changer—crisp, fresh, and perfect for those looking for a low-carb or gluten-free option.

The Perfect Pairings

This burger isn’t just versatile in how you serve it—it also fits seamlessly into any diet or occasion. Whether you’re grilling for a casual family dinner or hosting friends for a backyard gathering, this recipe shines.

For a special touch, I’d serve it alongside a cold salad—something crisp and refreshing to balance the warmth of the burger. A simple cucumber and dill salad or a tangy slaw would pair beautifully.

Tips for Success

  1. Pick the Right Apple: I recommend Fuji apples for their natural sweetness and firm texture.
  2. Squeeze the Apple: Removing excess moisture is key to keeping the burgers from falling apart.
  3. Top It Right: Caramelized onions are a must-try. Trust me, they bring out the best in this burger.
  4. Be Gentle: Mix the burger ingredients gently to avoid overworking the meat, which can make the patties tough.

A Burger for All Seasons

Whether you’re looking for a fresh take on classic comfort food or a dish that bridges dietary preferences, this apple-infused burger hits the mark. It’s an easy way to impress your family or guests without straying too far from the familiar.

The next time you’re in the mood for a gourmet twist, give this recipe a try. Who knows? It might just become your new favorite way to enjoy a burger.

Have you tried adding apple to your burgers? Or maybe you have your own favorite gourmet burger twist? Share your ideas in the comments—I’d love to hear them!

RECIPE: Apple-Stuffed Pork & Beef Burger

Description A juicy, flavorful burger that combines ground beef, pork, and minced apples mixed directly into the patty for moisture and subtle sweetness throughout every bite.

Ingredients

For the Burger Mix:

  • 1 lb grass-fed ground beef (80/20)
  • 1/2 lb ground pork
  • 1 Fuji apple, finely minced or grated
  • 1 tablespoon fresh sage, minced
  • 2 cloves garlic, minced
  • 1 teaspoon salt
  • 1/2 teaspoon black pepper
  • 1 tablespoon Worcestershire sauce
  • 1 teaspoon Dijon mustard
  • 1/4 teaspoon ground cinnamon (optional)

For Serving:

  • 6 slices sharp cheddar cheese
  • Butter lettuce
  • Additional Dijon mustard
  • Low-carb buns (optional)

Equipment

  • Large mixing bowl
  • Box grater or food processor (for apple)
  • Grill or large skillet
  • Meat thermometer
  • Paper towels

Preparation Time

  • Prep: 15 minutes
  • Cook: 10-12 minutes
  • Total: 25-30 minutes

Servings 6 burgers

Instructions

  1. Grate or finely mince apple. Place in paper towels and squeeze out excess moisture.
  2. In a large bowl, combine:
    • Ground beef
    • Ground pork
    • Prepared apple
    • Sage
    • Garlic
    • Salt
    • Pepper
    • Worcestershire sauce
    • Dijon mustard
    • Cinnamon (if using)
  3. Gently mix with hands until just combined. Don’t overmix.
  4. Form into 6 equal patties, making a slight depression in center.
  5. Let patties rest 10 minutes at room temperature.
  6. Heat grill or skillet to medium-high.
  7. Cook patties:
    • 5-6 minutes first side
    • Flip and add cheese
    • 4-5 minutes second side or until internal temperature reaches 160°F
  8. Rest 3-5 minutes before serving.

Notes

  • Squeeze apple well – too much moisture will make burgers fall apart
  • Can use food processor for apple, but don’t puree
  • Mix meat gently to keep burgers tender
  • Perfect for fall grilling
  • Can make ahead and freeze
  • The apple adds moisture and helps keep burgers juicy
  • If mixture feels too wet, add 2-3 tablespoons almond flour
  • Great with caramelized onions as topping
  • Consider adding crispy bacon on top
Posted on Leave a comment

Shepherd’s Pie Gets a Low-Carb Makeover

Some comfort foods just can’t be replaced – but they can be reimagined. That’s what we did with this low-carb version of Shepherd’s Pie, swapping the traditional potato topping for turnips while keeping all the savory goodness underneath.

Shepherd’s Pie has always been a favorite for my wife and me, so transforming it for our new way of eating was a natural choice. The result? A dish that keeps the comfort food feeling while fitting our healthier lifestyle.

Like many of our kitchen experiments, this one came with some discoveries. The turnip topping needed a bit of tweaking – a touch of xanthan gum to thicken it up and some garlic salt to enhance the flavor made all the difference. And of course, no Shepherd’s Pie is complete without cheese in our house – a generous topping of Colby Monterey Jack takes this comfort food classic to the next level. We’ve always preferred our Shepherd’s Pie with cheese, and this low-carb version is no exception. The melty cheese adds that extra layer of indulgence that makes you forget you’re eating something healthier.

As with any family meal, the reviews were mixed. Two of our girls and my wife gave it an enthusiastic thumbs up, declaring it ‘a keeper.’ My son? Let’s just say he was less enthusiastic about the turnip substitution. But that’s part of our family’s food journey.

We have a rule in our house: you eat what’s fixed, or you don’t eat. However, we’ve found that our ‘no thank you bites’ policy works well for new dishes like this. It’s simple – take a few substantial bites, give it an honest try, and if it’s still not your thing, there’s always the option of making a PB&J. This approach has actually helped our kids become more open to trying new versions of familiar foods over time.

Every meal is an opportunity for improvement in our kitchen. After everyone tries a new recipe, I collect feedback. My wife suggested swapping the celery for peas in the next version – a change we’ll likely try. Sometimes these adjustments are based on pure instinct, but they’re always driven by what works for our family.

Is this version exactly like the traditional potato-topped Shepherd’s Pie? No. Is it healthier while still satisfying that comfort food craving? Absolutely. And in our journey toward better eating, that’s exactly what we’re aiming for.

Description A hearty, comforting shepherd’s pie that swaps traditional potatoes for turnips, making it perfect for low-carb lifestyles while keeping all the flavors your family loves.

Ingredients For the Turnip Topping:

  • 3 lbs turnips, peeled and cubed
  • 1/2 cup heavy cream
  • 4 tbsp butter
  • 1 tsp garlic powder
  • Garlic salt to taste
  • Salt and pepper to taste
  • 1/4 tsp xanthan gum
  • 2 cups Colby Monterey Jack cheese, shredded

For the Filling:

  • 2 lbs grass-fed ground beef
  • 1 medium onion, diced
  • 2 celery stalks, finely diced (or 1 cup peas)
  • 2 medium carrots, diced small
  • 4 garlic cloves, minced
  • 2 tbsp tomato paste
  • 1 cup beef broth
  • 1 tbsp Worcestershire sauce
  • 1 tsp dried thyme
  • 1 tsp dried rosemary
  • Salt and pepper to taste
  • 2 tbsp olive oil

Equipment

  • Large pot for boiling turnips
  • Large skillet or sauté pan
  • 9×13 baking dish
  • Potato masher or hand mixer
  • Cutting board
  • Sharp knife
  • Measuring cups and spoons

Preparation Time

  • Prep: 30 minutes
  • Cook: 45 minutes
  • Total: 1 hour 15 minutes

Servings 6-8 servings

Instructions For the Turnip Topping:

  1. Peel and cut turnips into 1-inch cubes
  2. Boil turnips in salted water until very tender, about 20-25 minutes
  3. Drain well and return to pot
  4. Add cream, butter, garlic powder, garlic salt, salt, and pepper
  5. Sprinkle xanthan gum over mixture
  6. Mash until smooth and creamy

For the Filling:

  1. Preheat oven to 375°F
  2. Heat olive oil in large skillet over medium heat
  3. Add onion, celery (or peas), and carrots; cook until softened (about 5 minutes)
  4. Add garlic, cook 1 minute more
  5. Add ground beef, breaking it up while cooking until browned
  6. Stir in tomato paste, cook 1 minute
  7. Add broth, Worcestershire sauce, thyme, and rosemary
  8. Simmer until liquid reduces slightly, about 5-10 minutes
  9. Season with salt and pepper

Assembly:

  1. Transfer meat mixture to 9×13 baking dish
  2. Spread turnip mash evenly over meat
  3. Create texture on top with fork if desired
  4. Top with shredded Colby Monterey Jack cheese
  5. Bake 25-30 minutes until bubbling and cheese is melted and golden

Notes

  • If mixture seems too liquid, you can stir in 1-2 tbsp of coconut flour to thicken
  • Leftovers keep well in refrigerator for 3-4 days
  • Can be assembled ahead and baked later
  • Turnips release more water than potatoes, so make sure to drain them very well
  • Feel free to experiment with peas instead of celery for a different twist
  • The xanthan gum helps achieve a thicker, more potato-like consistency in the turnip topping
Posted on Leave a comment

Reinventing Fast Food Favorites: Homemade Square Burger Patties

As part of our family’s commitment to healthier eating, I’ve been working on recreating some of our favorite meals with better ingredients. Today’s kitchen experiment? Square burger patties inspired by Wendy’s, but made with high-quality grass-fed beef.

Why square patties? Simple – I wanted to create something that would be quick to cook, consistent in size, and easy to store for those busy weeknight dinners. Plus, there’s something satisfying about a perfectly square burger that hangs over the edges of your bun!

The real star of this recipe is the grass-fed beef. If you’ve never worked with it before, let me tell you – the taste difference is remarkable. It’s SO MUCH BETTER than conventional beef, bringing a richer, more complex flavor to these simple patties.

The prep process is surprisingly quick. Working with cold beef (this is key!), it took me only about 15 minutes to season the meat, roll it out, and cut it into uniform squares. Using parchment paper and a ruler makes the process almost foolproof, creating perfect 4×4 inch patties that are just the right thickness for fast cooking.

Here’s what you’ll need:

  • 2 lbs grass-fed ground beef (keep it cold!)
  • 1 teaspoon salt per pound
  • 1/2 teaspoon black pepper per pound

Equipment:

  • Large baking sheet (18″x13″)
  • Parchment paper
  • Rolling pin
  • Ruler
  • Sharp knife
  • Wax paper for separating patties

The Process:

  1. Gently mix your seasonings into the cold beef and let it rest for 10 minutes
  2. Line your baking sheet with parchment paper
  3. Roll the meat to an even 1/4 inch thickness between two sheets of parchment
  4. Chill for 15 minutes
  5. Cut into 4″x4″ squares using a ruler as your guide
  6. Layer between wax paper for storage

While I haven’t frozen these yet (this is my first batch!), they’re designed to go straight from freezer to grill or pan. I’ll update this post with cooking times and tips once I’ve had a chance to test that aspect.

Pro Tips:

  • Keep everything cold during the process
  • Make straight cuts from the edges inward
  • Clean your knife between cuts if needed
  • Save the trim pieces to reroll for additional patties
  • A standard baking sheet should yield 8-10 square patties

This recipe is part of our ongoing effort to create healthier versions of our favorite foods. By making them at home, we control the quality of ingredients while still enjoying the convenience of having ready-to-cook meals in the freezer.

Stay tuned for an update on how these cook from frozen and our favorite ways to serve them. In the meantime, if you try this method, I’d love to hear your results!

Stay Connected on Our Wyoming Adventure

Join our growing community of intentional living enthusiasts. Get fresh content about our Wyoming adventure, simple living tips, and upcoming recipes delivered straight to your inbox. Unsubscribe anytime - but we bet you won't want to!

Please wait...

You're in! Thanks for joining our journey. Watch your inbox for fresh content about intentional living, great recipes, and more!